Thursday, May 29, 2008

finishing touches for your eyebrows

For that extra little bit of polish to your makeup look, think about finishing touches for your eyebrows.

For any look, from a natural look to full on glamour, making sure your eyebrows are groomed and defined can make a huge difference.

On those days that you aren't planning on wearing much makeup (like the lazy days of summer), simply combing your brows with a spoolie (clean mascara wand) or a brow comb in an upward and outward direction is great. If your brow hairs are on the unruly side, comb through a little brow wax or even a bit of untinted lip balm to tame and subtly define them.

If you are going to be wearing a stronger makeup look, you can define your brows with either a pencil or a powder. It really is a matter of preference and comfort when choosing your weapon, but there are a few tips I can offer for both:

When choosing a pencil, look for a BROW PENCIL specifically, because they are formulated with the best texture, which is drier than other pencils. Do not fill in your brows with an eyeliner (too creamy) or, heaven forbid, a lip liner (just WRONG - too creamy and usually too warm toned).

If you are more comfortable with a powder, you can use a brow powder specifically, or a matte eyeshadow with a neutral tone. Apply the powder with a small angled brush with firm bristles.

Use short strokes to mimic hairs and fill in following the direction of the hair growth.

As a guideline, blondes should look for a tone similar to their overall hair colour or slightly darker; brunettes should look for a tone similar to their colour or slightly lighter.
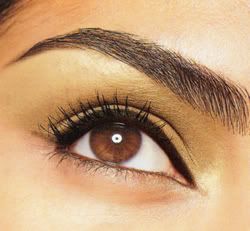
from beaut.ie
from beaut.ie

AND MY BIGGEST TIP BY FAR:

Always comb through your brows with a spoolie or brow comb AFTER you have filled them in. This ensures that the edges are softened and look natural. If you feel that you have filled them in too heavily, comb more vigorously, zigzagging side to side as you comb up and out to lift some of the colour and diffuse the effect.
Wednesday, May 7, 2008

curling eyelashes

Curling my eyelashes is a vital step in any of my eye makeup looks. I have fairly straight eyelashes, so I cannot under emphasize the difference made by curling my eyelashes before applying mascara.

The first time I tried curling my eyelashes, I was very excited. I was a little over-zealous with the curling and pinched my eyelid (I was about 10, so mistakes were to be expected). I also squeezed and held the curler clamped shut for far too long (15 seconds, 30 seconds, I don't really remember). My lashes ended up at a 90 degree angle. Needless to say it took a little practice to get it right.

My biggest tip for making the best curl is to "walk the curler" along your eyelashes, and this is a technique specifically for clamp curlers (the most common type). I start by trying to make the first crimp as close to my lash line as possible, without catching my eyelid. I then hold the curler down for a brief moment, up to about 5 seconds. After creating this crimp, I pull the curler out a little bit from the base of the lashes and make a second crimp. Making 2 crimps (or possibly 3 if you can manage it) creates the prettiest and most effective curl, in my opinion.

Try to curl your lashes before you put on mascara, because mascara can make your lashes stick to the crimping pads in the curler, pulling them out.

Good curlers can be found at different price points, although the Cadillac of eyelash curlers is by Shu Uemura. I was lucky enough to receive my Shu for my 18th birthday, which is nice because it retails for around $25. It really is a superior tool, making curling a breeze, and giving the nicest effect.

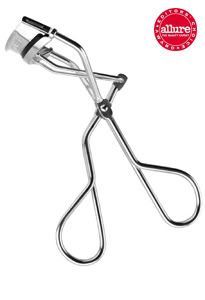
Shu Uemura eyelash curler
Shu Uemura eyelash curler from shuuemura-usa.com

If you are not looking to spend that much (and I wouldn't blame you), I would try and look for a curler with a metal body (as opposed to plastic) because you can squeeze gently but effectively. I find the plastic ones feel flimsy and don't give enough curl. Sometimes curlers are labelled with different levels of curl, from natural to dramatic. Get the dramatic, because I have found that any of the ones labelled natural don't do much of anything!

You may need to test a few to find the one that fits your eye the best and works the most effectively for you, but I highly recommend you try it!

Friday, May 2, 2008

gloPrecision eye pencils in US Elle

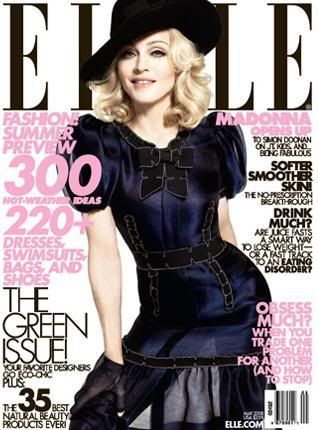
Check out this month's US Elle magazine, with the ever-immaculate Madonna on the cover!

Madonna US Elle May 08
from frillr.com

Flip to page 212 and see my beloved gloPrecision eye pencils named as the best eyeliner in their Green Stars makeup feature.

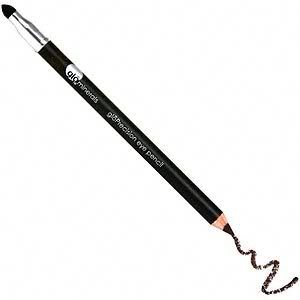
gloPrecision eye pencil
from dermstore.com

They cited that these pencils "contain finely crushed minerals for supervelvety, high-impact colour." I love them because they come in great colours (black, black-brown, brown, charcoal, peach, plum, deep olive, antique gold, silver lilac) and have excellent staying power. They can go on very precisely and intense, or you can smudge them out with the smudger on the other end of the pencil to create a softer effect. The glominerals line also has great lip and brow pencils, too!